resources
these are for you!
- breedz
- eye / iris hexing tutorial
- custom playscenes in linux / using gimp
- fixing resolution woes in linux / using wine
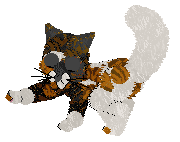
these are for you!

you're welcome to modify / hex / poke around / whatever these guys. i'm not very proficient at hexing, so my main thing is just tweaking vanilla breeds into proportions i like better. also adding plenty of variations because that's not too hard.
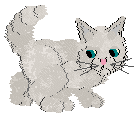
sol's chinchilla persian | OW
petz 4 | v1 29/07/24
gives the chinchi a less extreme look. 5 eye colors, 2 tail types (fluffy and very fluffy), 4 sizes
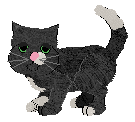
sol's bw shorthair | OW
petz 4 | v1 01/03/22
based on gyiyg's file. white patches are individual variations (22 total), 5 eye colors, pink or black noses, vanilla chest / face streaks. white areas all use the same separate texture for ease of hexing
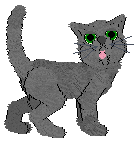
sol's russian blue | OW
petz 4 | v2 27/02/22
4 sizes, 4 coat colors and 4 eye colors
honestly more as personal reference than anything else. i like my petz with big pupils / irises so the eye whites are smaller / less human. here's a micro tutorial on how to do that with lnz pro. a bit of a companion to this eye hexing tutorial by unique petz.
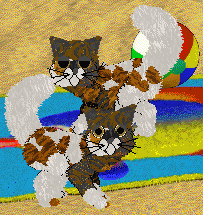
this is a really really simple tweak. in the pet or breed code itself, the section labeled [Eyes] lists the relevant balls (for catz eyes are 15 14 and pupils 28 27). scroll down to [Ballz Info] for them. the count starts at 0, and they are in alphabetical order, so the order is always eye then iris, left then right. or you can just check the built-in lnz pro manual or this spreadsheet.
the lines will be something like this: 244 104 0 0 3 15 -1 -1. it's pretty easy to find once you know what you're looking for. the first two numbers are pupil and iris colors respectively, so you might wanna change that (handy palette link). but what i'm looking for is the third to last number, aka the one before -1. this adjusts the pupil size, and with it the iris (which is the outline). the number before that is the iris width, and it scales very quickly so you'll probably only need to increment it by 1 or 2 if you choose to. i don't always, but it can look good with larger eyes or if you'd like the pupil to be smaller.
ok so since the p4 playscene editor seems so straightforward no one really makes tutorials for it. specifically getting images to work is a pain when all anyone says is "save as a bmp with paint". i don't have ms paint! i'm a linux user! also that's just a lame way to explain things.
here's what you need for a playscene background: grab this petz palette .pal file. import it into gimp (windows > dockable dialogues > palettes, then right click on it and import palette file). open an image, make it preferably 1024x768, image > mode > indexed (choose the petz palette). export as bmp and under compatibility options toggle the "do not write color space information" option. this is vital and why things didn't work for me and i couldn't understand why. now create the scene as normal!!
do your custom playscenes sometimes look all out of wack — diagonally warped, carrier case not working? your resolution might be disagreeable to this old piece of software. idk how to fix it in windows. i suppose this might work on mac as well.
use the terminal to launch wine explorer /desktop=petz,1024x768 "path to petz.exe". helps to make a custom launcher about it. the game behaves a little better if you close it with its own X button, and not the wine wrapper — you don't lose data but it doesn't default to your last playscene and pet when you open the game again.
downside is you can't take petz into your desktop this way; they'll stay within the wine window.